How to Start a Podcast in Kenya: The Complete Beginner’s Guide (2026)
The Kenyan media industry is experiencing a rapid shift from traditional radio to on-demand video podcasts on platforms like YouTube. Launching a successful show requires a concrete content strategy before you even purchase a microphone.
This guide outlines the practical steps to build a professional podcast brand from the ground up here in Kenya.
Step 1: Define Your Niche and Format
Many beginners make the mistake of buying equipment before refining their concept. You need to establish exactly who you are talking to and what problem you are solving.
A broad topic like "Kenyan Lifestyle" is often too vague to build a loyal audience. A specific niche like "Financial Planning for SMEs" or "Kenyan Football Analysis" works much better because it targets a distinct community.
The 10-Episode Test
Try to write down titles for your first ten episodes before you record anything. If you struggle to find ten distinct topics, your niche might be too narrow or you might lack enough material for a long-term show.
This exercise saves you from "podfading" which is the common trend of quitting after three episodes due to a lack of content.
Choosing a Format
Your format determines the equipment you will need later. You should decide on one of these three common structures.
The Solo Monologue
This is the easiest format to start logically. It requires only one microphone and one camera. It relies entirely on your expertise and ability to hold the audience's attention without a partner.
The Interview Show
This is the most popular format in Nairobi. Bringing in guests helps you grow because they share the episode with their own followers. However, it requires more logistics regarding scheduling guests and requires a budget for a second microphone.
The Co-Host Banter
This format relies on the chemistry between two presenters. It is highly engaging but requires strict commitment from both parties to meet consistently for recordings. You must ensure your co-host is as dedicated to the project as you are.
Step 2: Essential Audio Equipment for Livestreaming in Kenya
Audio quality is the single most important factor in podcasting. Viewers will tolerate average video lighting, but they will stop listening immediately if the audio is echoey or difficult to hear.
You do not need to spend a fortune to get started, but you must choose the right type of microphone for your environment.
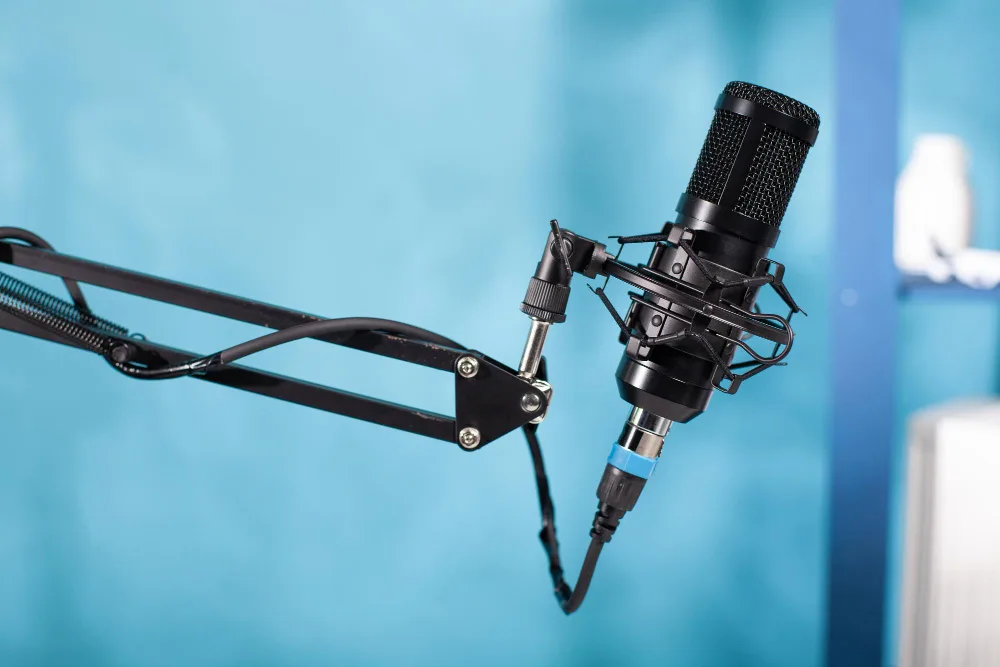
Microphone Choice: Dynamic vs. Condenser

Nairobi is a noisy city. Traffic, construction, and neighbors often create background noise that ruins recordings. We strongly recommend using Dynamic Microphones rather than Condenser Microphones for home setups.
Dynamic mics are less sensitive to distant sounds and focus strictly on the voice directly in front of them. This makes them ideal for rooms without professional soundproofing.
Entry-Level Options (USB)
For beginners on a budget, the Samson Q2U or the Audio-Technica ATR2100x are excellent choices. These microphones allow you to plug directly into your laptop via USB without needing extra equipment.
They offer professional sound rejection at a fraction of the cost of studio gear.
Professional Options (XLR)
The industry standard for top-tier podcasts is the Shure SM7B. This microphone delivers the rich, "broadcast" tone associated with professional radio.
However, it requires an XLR connection and a powerful pre-amplifier to work correctly. A popular mid-range alternative is the Shure MV7, which offers both USB and XLR connections, allowing you to upgrade your setup over time.
Audio Interfaces and Mixers
If you choose a professional XLR microphone, you cannot plug it directly into your computer. You need an interface to convert the analog signal to digital.
For solo creators, the Focusrite Scarlett 2i2 is a reliable and common choice. For multi-person podcasts, the RodeCaster Pro II is the gold standard.
It allows you to record up to four microphones simultaneously and includes buttons for sound effects, phone call integration, and automatic level processing.
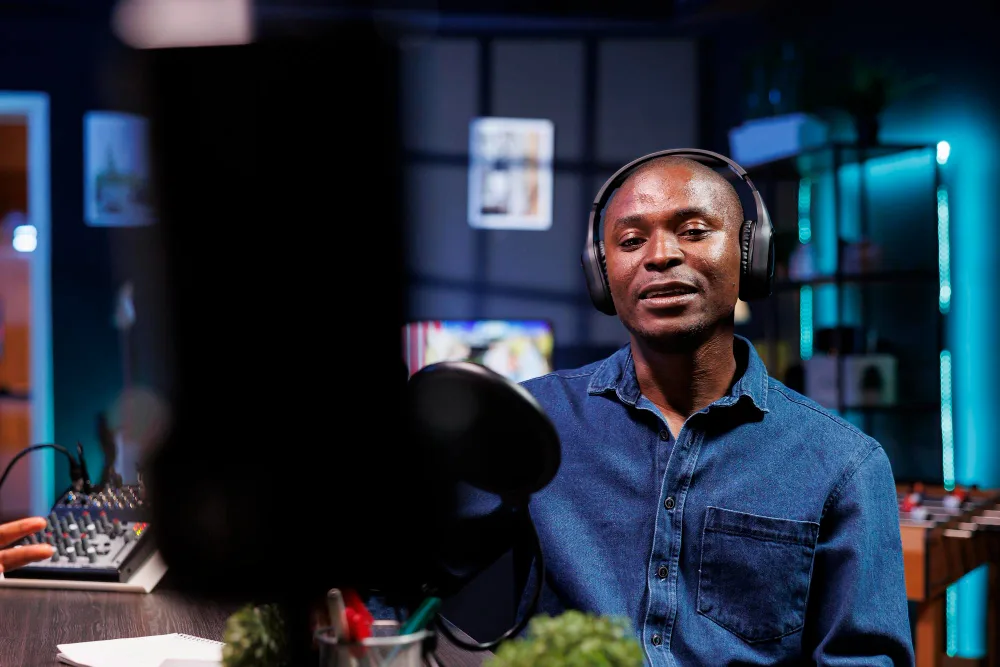
Headphones for Monitoring
You must wear headphones while recording. This allows you to hear exactly what the microphone is capturing in real-time. If you are drifting away from the mic or if there is a buzzing sound, you will notice it immediately.
You do not need expensive models for this. Any pair of wired over-ear headphones, such as the Audio-Technica M20x, will work. Avoid using Bluetooth headphones as they often have a slight delay that makes it difficult to speak naturally.
Step 3: Video Equipment for the "Vodcast" Era
Most successful podcasts in Kenya now launch as "Vodcasts" (Video Podcasts). Distributing your show on YouTube and repurposing short clips for TikTok and Instagram Reels is the most effective way to grow an audience.
Audio builds loyalty, while video drives discovery.
Starting with Your Smartphone
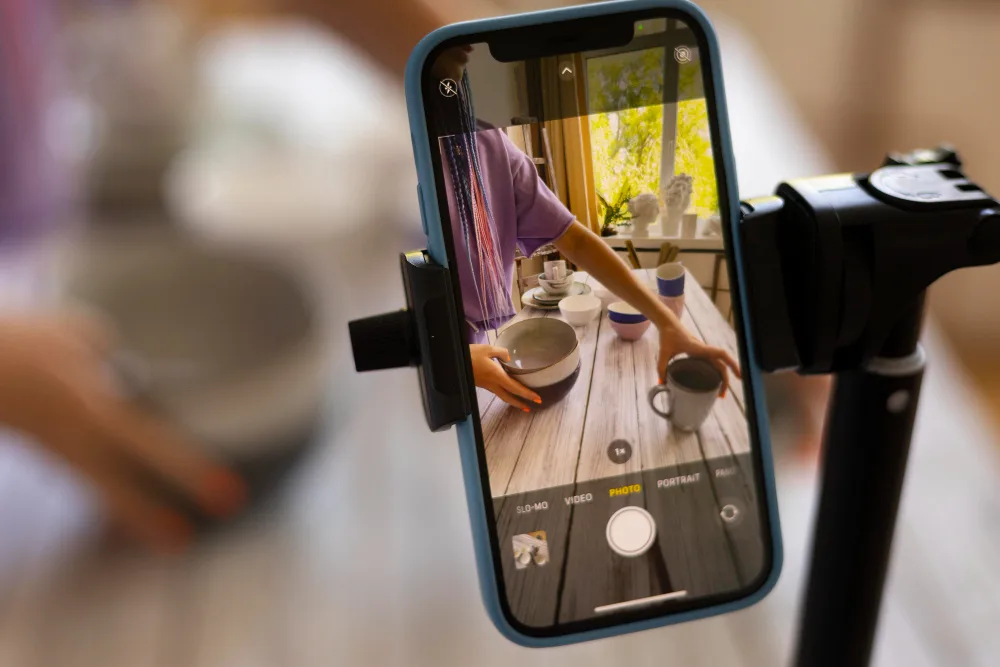
You do not need a cinema camera to start. Modern smartphones like the iPhone 13 (and newer) or the Samsung S22 series utilize sensors capable of recording excellent 4K video.
The key to using a phone is the "Main Camera" on the back, not the selfie camera. We recommend using a tripod to keep the shot stable and ensuring you have enough storage space, as 4K video files consume gigabytes of data quickly.
Upgrading to Mirrorless Cameras
When you are ready to invest in dedicated video gear, look for cameras that offer unlimited recording times and reliable autofocus. Standard DSLRs often stop recording after 30 minutes, which ruins the flow of a conversation.
The Sony ZV-E10 or the Sony A6400 are popular choices among Kenyan creators. They connect easily to computers for live streaming and offer sharp 4K resolution, which allows you to crop vertical clips for social media without losing quality.
Lighting Essentials
A high-end camera will look poor in a dark room, while a smartphone can look professional with good lighting. The goal is to separate the subject from the background.
The Key Light
This is your main light source. Avoid relying on ceiling bulbs which create unflattering shadows under the eyes (raccoon eyes). Place a soft light source, like a Godox SL60W with a softbox, at a 45-degree angle to your face.
This creates a soft, pleasing look that mimics professional studio setups.
The Ring Light
 Ring lights are a common budget option. They work well for solo creators when placed directly in front of the camera. However, they can reflect in your eyes or glasses.
If you use one, try bouncing it off a wall rather than pointing it directly at your face to diffuse the intensity.
Step 4: Software for Recording and Editing
You need reliable software to capture your content and polish it for release. The choice of software depends on whether you are recording with guests in the same room or connecting with them remotely.
Remote Recording Solutions
Many beginners make the mistake of using Zoom or Google Meet for interviews. These platforms compress audio heavily to ensure the call doesn't drop, which results in "robotic" and low-quality sound.
We recommend using dedicated remote recording platforms like Riverside.fm or Zencastr.
These platforms use "local recording" technology.
They record the high-quality audio and video directly on your guest's device and upload the file to the cloud after the session ends. This ensures that even if the internet connection drops during the call, you still get a crystal-clear 4K video file and uncompressed audio for your final edit.
Editing Software (DAWs)
Once you have your files, you need to edit them. You do not need to pay for expensive subscriptions immediately.
Free Options
For audio-only editing, Audacity is a powerful, free tool that runs on any computer. It allows you to remove background noise and balance volume levels.
For video editing, DaVinci Resolve is the best free option available. It offers professional color correction and audio tools that rival paid software.
Professional Options
If you are building a long-term workflow, the Adobe Creative Cloud suite is the industry standard. Adobe Audition specializes in audio repair and mixing, while Adobe Premiere Pro handles multi-camera video editing efficiently.
These tools also have AI features that can automatically transcribe your audio or remove filler words like "um" and "uh" to speed up your workflow.
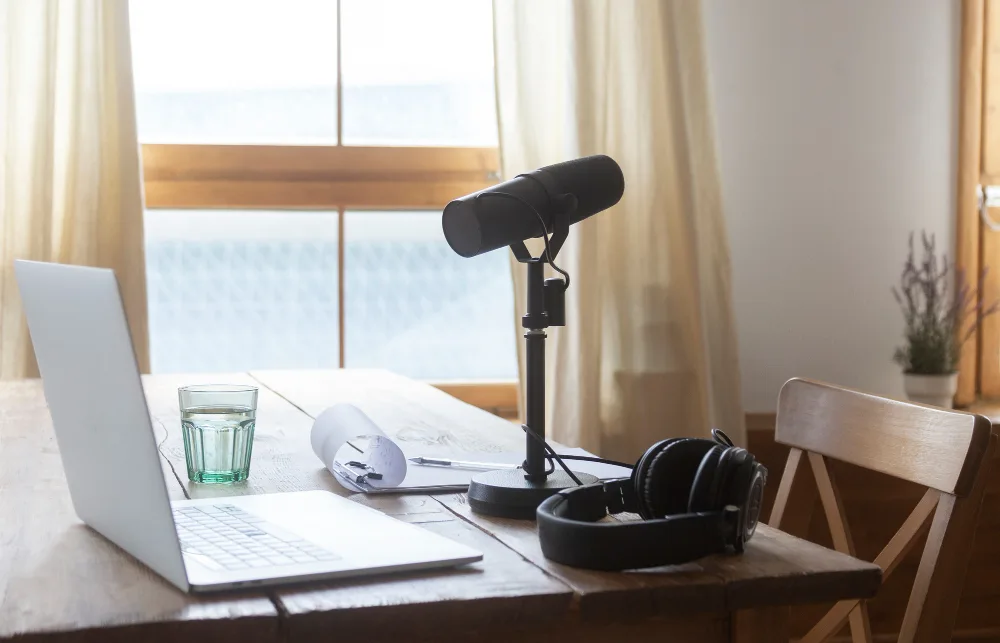
Step 5: Preparing Your Recording Space
The environment where you record affects your sound quality more than the microphone you use. A high-end microphone will sound terrible in an empty room with hard surfaces. Sound waves bounce off concrete walls and tiled floors, creating an echo that makes the audio muddy and hard to understand.
Managing Acoustics
You do not need to install professional acoustic foam panels to get good sound. The goal is to dampen the reflection of sound. You can achieve this by filling the room with soft materials.
Place a thick rug on the floor. Close heavy curtains over the windows. If you are recording at a dining table, place a blanket or towel on the table surface. These soft items absorb sound waves and result in a drier, more professional voice recording.
Dealing with External Noise
Nairobi is a vibrant city, but traffic noise and construction work are enemies of clean audio. Choose a room that does not face a busy road. Record during quieter times of the day, such as late evenings or early Sunday mornings.
Ensure you turn off any fans, air conditioning units, or noisy fridges nearby. Your microphone will pick up the low hum of these appliances, which creates a distracting background buzz in the final episode.
Step 6: Hosting and Distribution
A common misconception among beginners is that you upload your audio files directly to Spotify or Apple Podcasts.
This is not how it works. Instead, you upload your episode to a "Podcast Host," which generates an RSS Feed. This feed then distributes your content to all listening platforms automatically.
Audio Hosting Platforms
For most starters, we recommend Spotify for Podcasters (formerly Anchor). It is completely free and offers unlimited storage.
It creates your RSS feed instantly and allows you to distribute your show to Apple Podcasts, Pocket Casts, and Google Podcasts with a single click. It also provides basic analytics to see where your listeners are coming from.
Video Distribution on YouTube
Video podcasts require a different approach. You must create a dedicated YouTube channel for your show. When uploading, ensure you mark the "Playlist" as a Podcast within YouTube Studio.
This is a specific setting that pushes your episodes to the YouTube Music app, expanding your reach beyond just the main video platform.
YouTube is currently the most powerful discovery engine for podcasts in Kenya, so treating your channel metadata (Titles, Thumbnails, and Tags) seriously is essential for growth.
Step 7: Launch Strategy and Monetization
You have recorded your content and set up your host. Now you need to launch. Do not release just one episode on your first day.
We advise launching with three episodes simultaneously. New listeners who discover your show will want to hear more immediately. If you only have one episode, they listen once and leave.
If you have three, they binge-listen, which signals to the algorithm that your show is engaging.
Making Money in Kenya with Podcast and Livestreaming
Monetization takes time, but there are three primary paths for Kenyan creators.
YouTube Partner Program (AdSense)
This is the most direct method. Once you reach 1,000 subscribers and 4,000 watch hours, YouTube places ads on your videos and pays you a share of the revenue. It requires consistent uploads to build the necessary traffic.
Brand Sponsorships
You do not need millions of views to get a sponsor. Niche podcasts often attract Small and Medium Enterprises (SMEs) looking for specific audiences.
A podcast about "Kenyan Real Estate" with only 500 listeners is highly valuable to a local property developer because those listeners are high-intent buyers.
Direct Support (M-Pesa)
Kenyan audiences are supportive of creators they value. You can set up a "Buy Me a Coffee" page or simply include a Till Number in your description. Many loyal listeners are willing to contribute small amounts via M-Pesa to keep the show running.
Expert Advice on Starting Podcast in Kenya
Building a home studio requires a significant investment of time and money. You must learn about audio engineering, lighting, and camera settings, in addition to buying the equipment.
For many creators, the technical barrier prevents them from ever recording their first episode.
If you prefer to focus on your content rather than the cables, renting a professional studio is the most efficient solution.
The Photoshoot Studio Kenya provides fully equipped video podcast studios in Westlands. Our spaces are acoustically treated to remove echo and come with professional lighting grids, 4K cameras, and Shure microphones already set up.
You simply walk in, record your conversation, and leave with the high-quality files. We handle the technical monitoring so you can focus on being a great host.
Ready to start recording? View our studio rates and book your first session today.